
3D Product Rendering vs Photography for Wellness Brands
Compare 3D product rendering and photography for wellness brands: prototypes, materials, variants and reusable assets. Choose a production route for your brief.
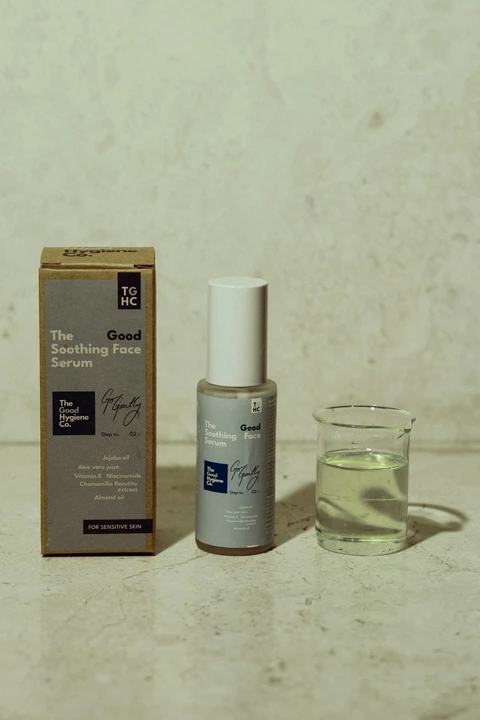
Should your next wellness product campaign use 3D rendering, photography or a combination of both?
Choose photography when the image needs to document a finished product, its real texture or a person using it. Choose 3D product rendering when you need controlled views, planned variants or visualisations before a physical sample exists. A hybrid workflow can combine photographed people or materials with a digital product, provided the final image represents the product accurately.
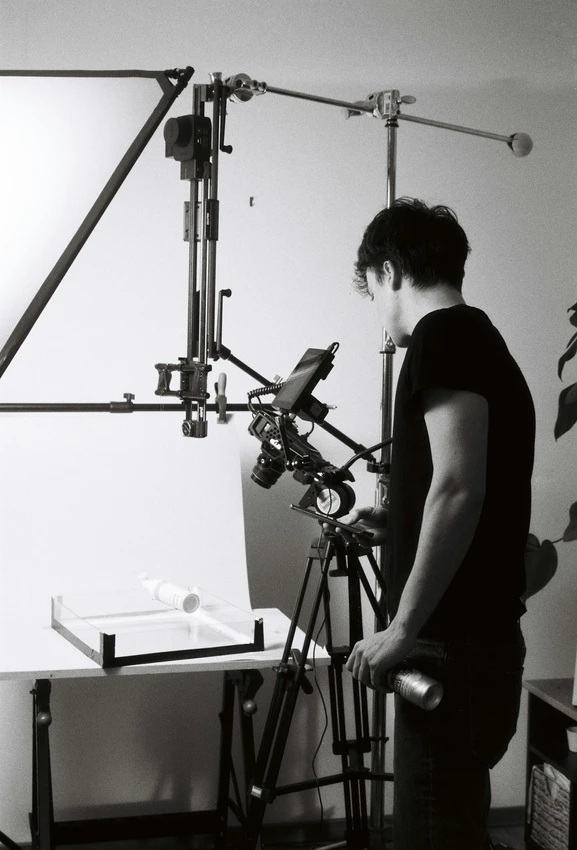
For wellness brands, the decision should start with what the audience needs to understand: packaging, scale, use or a specific feature. This guide compares the production choices without assuming one is always cheaper or more convincing. The photographs illustrate production considerations; they are not Mimic project examples or endorsements. For a coordinated product film, explore 3D product animation for wellness brands.
Table of Contents
Choose 3D product rendering, photography or a hybrid workflow
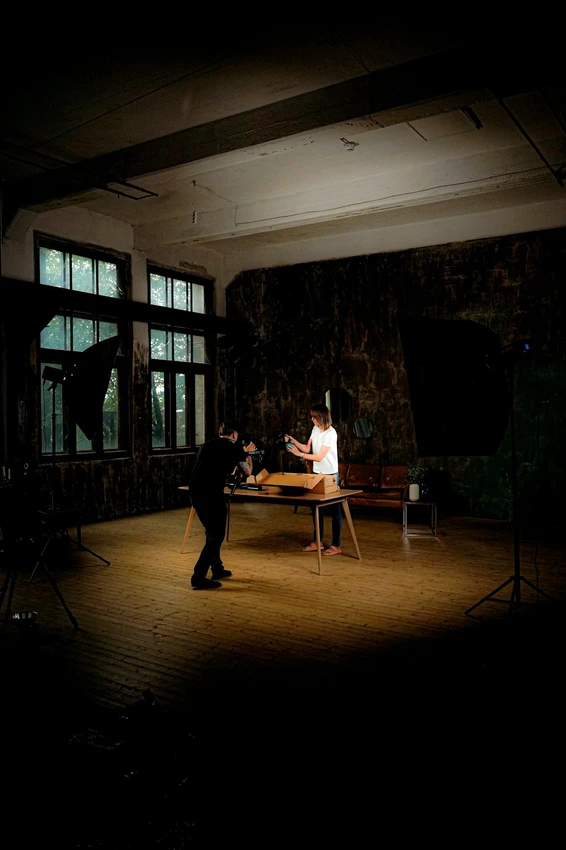
A product shoot brings together the physical item, a camera, lighting and a set. That makes it a useful starting point for showing a real sample under agreed conditions. A rendering starts with a digital model, materials, lights and a virtual camera. Both routes require art direction, accurate references and review; neither automatically produces an accurate or persuasive image.
Photography suits evidence of physical appearance. If a launch depends on showing how a grip sits in a hand, how fabric folds or how a cream actually looks, a shoot can capture those details directly. Styling, retouching and lighting still influence the result. Keep an approved sample available and distinguish an attractive campaign treatment from a faithful catalogue view. A heavily retouched photograph can misrepresent a product just as easily as an inaccurate render.
3D rendering suits controlled product presentation. A digital scene lets the team position cameras, adjust lighting and develop views that would be difficult to shoot physically. This can help when a product is still being developed, when several packaging versions share a shape or when the same object must appear in stills and animation. The model must represent the correct design revision, and unusual materials may need substantial development before approval.
Hybrid production suits different needs within one campaign. Photograph the real environment or person, then integrate a digital product where that solves a defined production problem. Alternatively, use photography for tactile close-ups and rendering for clean product views. Plan camera perspective, shadows and lighting together so the assets feel consistent. Hybrid work adds coordination and compositing; it should have a clear purpose rather than become an automatic compromise.
Use a real-product photograph when physical handling, fit or a specific surface is the central message.
Consider CGI when the brief needs controlled angles, an unavailable prototype or a planned family of variants.
Consider a hybrid when the campaign requires both human interaction and flexible product presentation.
The choice also depends on the channel. A small ecommerce thumbnail needs clear shape and readable packaging; a large campaign image may need detailed material work and space for copy. Mimic's advertising services put these outputs into a broader production context. Agree what each image must communicate before choosing the technique.
Compare prototypes, product variants and future changes
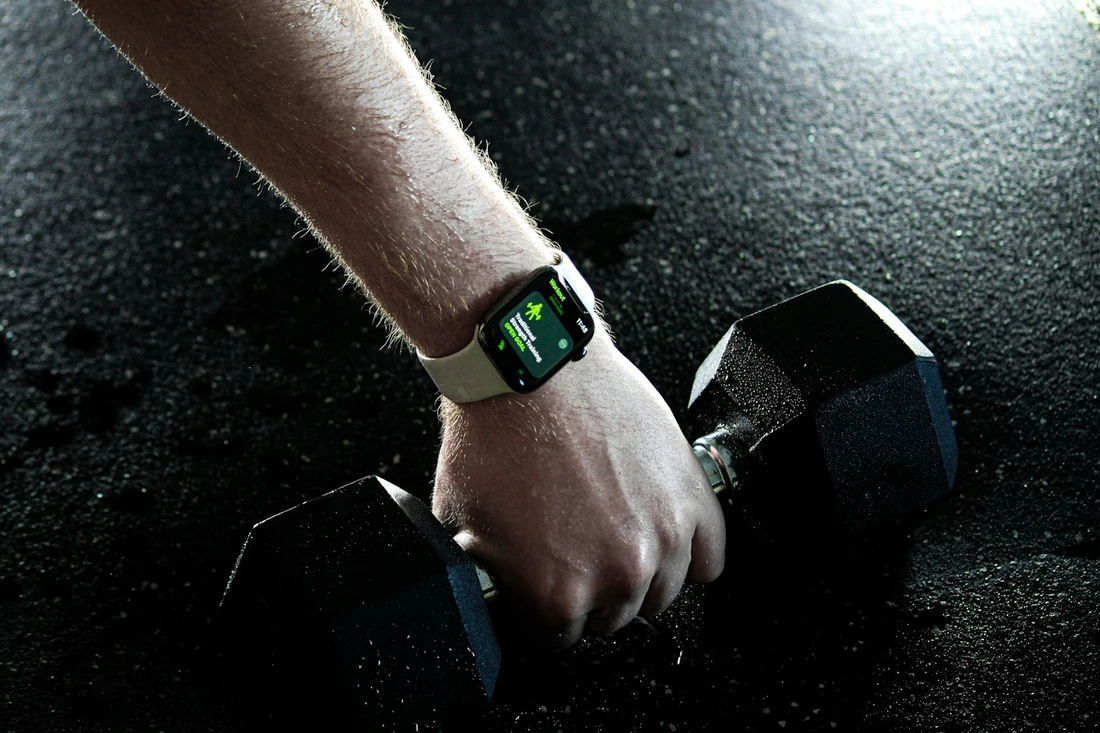
Imagine a fitness wearable launching in three strap colours. This is an illustrative brief, not a reported client project. Photography could show a finished watch being worn, while CGI could create consistent isolated views of the colour range. Whether that combination makes sense depends on available samples, approved dimensions, material references and the number of deliverables. Three versions alone do not prove that rendering will cost less.
If the product already exists, provide a representative sample and document what is final. Check the packaging, screen artwork, accessories and finish against the version customers will receive. A shoot needs the right physical items; a CGI production needs enough reliable information to reconstruct them. A prototype with temporary buttons or an unfinished label should not silently become the reference for final sales imagery.
If only CAD or design files exist, rendering can visualise the proposed product before a finished sample is available. CAD may establish shape but still need cleanup, UV mapping, materials or additional detail for close shots. Technical drawings rarely describe every surface imperfection or optical property. Decide whether an image is a concept, a development visualisation or a representation of an approved final design, and label it accordingly where the distinction matters.
For variants, separate a colour or artwork change from a geometry change. Updating a label on an approved bottle may be relatively contained. Changing the bottle profile, closure or embossed detail can affect modelling, lighting and every output. Photography has a similar distinction: a packaging swap might need a new product sample and reshoot, while a different crop may be possible from an existing capture. Ask what each proposed change actually involves.
A practical asset review should identify the current file owner and revision number, which product details are approved, which variants share geometry and which require different components. Keep a small change log. If the design team replaces a clasp after image approval, flag that revision before creating dozens of derivatives. Consistent version control is more useful than assuming either method makes changes effortless.
For fitness equipment, scale creates another decision. A large machine may involve transport and studio space for photography; a detailed digital model may involve extensive reconstruction. Compare those actual tasks. The technology overview explains the studio's wider production capabilities, while product animation cost factors covers the variables to discuss when the deliverables include motion. Avoid applying an animation quote directly to a still-image brief.
Review materials, labels and human interaction for accuracy
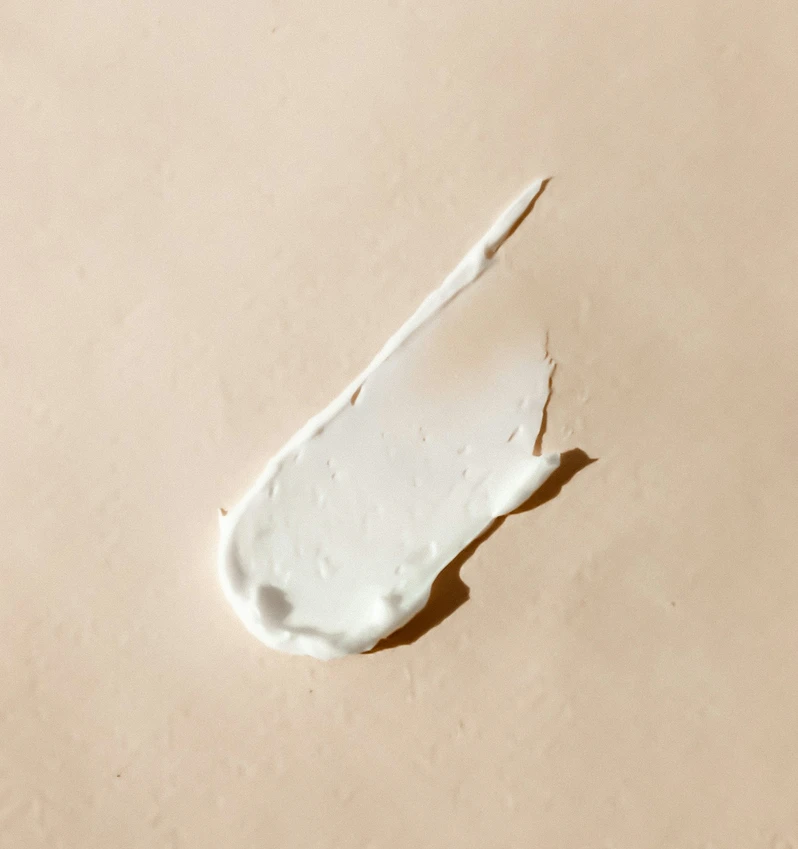
The surface of a wellness product often carries the message: clear glass, brushed metal, soft fabric, a matte cap or a viscous cream. Photography records a physical surface under particular lighting. CGI describes that surface through geometry, textures and material settings. Each needs a review process that checks the product as well as the overall visual style.
Start with the most difficult material rather than approving only an easy wide shot. For transparent packaging, compare the silhouette, wall thickness, liquid level, cap and label visibility. For fabric, check the weave, seams and how the material bends. For reflective metal, inspect the shape and placement of highlights. A cream sample can communicate visible texture, but neither a photograph nor a simulation proves how the formulation performs on skin.
Check product truth separately from creative treatment. Establish a neutral reference view alongside the campaign lighting. A warm set can change the perceived colour of a white bottle or pale strap. Screen displays and exported colour profiles also affect appearance, so agree the review conditions and intended channels. Do not promise that one approved screen image guarantees an exact match on every device or in print.
Review text at its final size. The approved label artwork should supply product names, quantities and other wording. Inspect the final crop rather than relying on a large source image where everything is legible. A technically sharp render can still have a distorted logo; a beautifully lit photograph can still hide a required detail in glare. Product and brand owners should approve those details before delivery.
For images involving people, examine contact, proportion and use. A wearable should sit plausibly on the wrist, and a fitness device should be shown with the correct accessories and handling. If a photograph is composited with CGI, check the contact shadow and perspective together. Do not imply that an illustrative model or stock-photo subject used or recommends your product. For treatment, recovery or performance messages, use only claims the brand has substantiated and approved; visual realism is not clinical evidence.
Use three approval passes: shape and scale; materials and artwork; then final composition and output. Consolidate feedback from the people responsible for each area. Our editorial policy describes the separation between production explanation and supported evidence. For broader studio context, consult Mimic's project portfolio, while checking the stated scope of each project rather than treating unrelated work as proof of product-rendering results.
Plan reusable assets and compare a small production pilot
A digital product model can support still images, a turntable or a product animation, but reuse has limits. A model built for a distant pack shot may not contain the detail needed for a macro close-up. An offline rendering scene may be too heavy for an interactive website. Editable models, scene files, materials and textures are separate delivery items unless the proposal explicitly includes them.
Photography also offers reusable assets: alternate crops, cutouts and a coordinated image library. Plan enough resolution and composition space for the agreed channels. A vertical social image and a wide website banner may need different framing rather than an automatic crop. If future content matters, discuss those uses while planning the shoot or scene, before committing to a single composition.
For a packaged wellbeing product, a useful pilot might be one neutral pack shot and one styled close-up. For a wearable, it might be an isolated view plus a real-use photograph. For equipment, it might be a full-object view and a detail that explains an adjustment. These are illustrative starting points. Select a pilot that exposes the difficult parts of your own product rather than commissioning an attractive image that avoids them.
Define the same product revision, angles, final dimensions and intended usage for each proposal.
Identify what the quote includes: sample handling, modelling, styling, retouching, rendering or compositing.
Agree who approves shape, materials, packaging and any factual wording, and how feedback is consolidated.
Specify final files, usage rights, editable source assets and the assumptions behind future adaptations.
Judge the pilot against clear acceptance criteria: correct shape, convincing materials, readable artwork, useful framing and consistent appearance across the required outputs. Record which corrections are included and which represent a change in scope. A cheaper first image may be less useful if every later variation requires rebuilding it; a reusable scene is unnecessary expenditure if the campaign needs only one straightforward photograph.
Adobe's product visualisation overview describes how digital models, graphics and materials work together. That supports the potential for editable visual assets, not a guarantee of savings for your brief. Use the wellness product animation briefing guide when the next stage includes a film. For the still-image decision, ask for a scoped comparison based on your actual samples and files.
Frequently asked questions
What is the difference between 3D product rendering and photography?
Photography captures a physical product through a camera. A 3D product render is calculated from a digital scene containing a model, materials, lights and a camera. Both can produce finished campaign images, but they require different inputs and approval work. Choose according to the product information and outputs you need.
Is 3D product rendering cheaper than photography?
Not automatically. Model preparation, difficult materials, scene complexity and revisions can make CGI demanding. Photography may involve samples, transport, a set, styling and retouching. Compare equivalent deliverables and usage rights. The number of future variants matters, but savings should be assessed from a scoped proposal rather than assumed.
Can a product be rendered before a prototype exists?
Yes, if there is sufficient approved design information to build it. Drawings, dimensions, CAD and material references help define the result. Unresolved details remain assumptions and need review. Make clear when the image represents a concept or development version rather than a finished product customers can already purchase.
Are CAD files enough to create a photorealistic product image?
They can be a strong starting point, but they may not include production-ready materials, textures, packaging artwork or close-up detail. The studio should inspect the files before confirming their suitability. Reference photographs or physical samples can help resolve how the final surfaces should look.
When should a wellness brand choose photography?
Photography is a strong option when real handling, fit, tactile details or a finished sample are central to the message. It can also suit a limited shot list with available products. Review the styling and retouching scope so the final image remains faithful to what is being sold.
Can the same 3D model be used for animation?
Often it can form the starting point, provided its quality, structure and usage rights suit the animation brief. Moving parts, close-ups and new lighting may need additional work. A rendered still does not automatically include an editable model or scene, so agree those deliverables in advance.
How can product colours and labels be checked?
Use approved artwork, material references and a neutral comparison view. Inspect text and logos in the final crop and size. Agree colour profiles and review conditions for the intended channel. Different displays and print processes can change appearance, so avoid treating a single screen approval as a universal colour guarantee.
What should we send when asking for a production recommendation?
Share product photographs or samples, available design files, approved packaging artwork and the intended outputs. Explain which details are final and what might change. Include the planned channels and deadline. Ask the studio to recommend photography, CGI or a hybrid against that specific scope, with assumptions stated clearly.
Conclusion
Photography, 3D rendering and hybrid production solve different visual problems. Start with the product truth and the audience's viewing needs, then compare the work required to produce accurate, usable assets. A representative pilot gives the team something concrete to approve before expanding the campaign.
Explore Mimic Wellbeing's approach, then share your product references and shot list to discuss an appropriate production route.
Should your next wellness product campaign use 3D rendering, photography or a combination of both?
Choose photography when the image needs to document a finished product, its real texture or a person using it. Choose 3D product rendering when you need controlled views, planned variants or visualisations before a physical sample exists. A hybrid workflow can combine photographed people or materials with a digital product, provided the final image represents the product accurately.
For wellness brands, the decision should start with what the audience needs to understand: packaging, scale, use or a specific feature. This guide compares the production choices without assuming one is always cheaper or more convincing. The photographs illustrate production considerations; they are not Mimic project examples or endorsements. For a coordinated product film, explore 3D product animation for wellness brands.
Table of Contents
Choose 3D product rendering, photography or a hybrid workflow
A product shoot brings together the physical item, a camera, lighting and a set. That makes it a useful starting point for showing a real sample under agreed conditions. A rendering starts with a digital model, materials, lights and a virtual camera. Both routes require art direction, accurate references and review; neither automatically produces an accurate or persuasive image.
Photography suits evidence of physical appearance. If a launch depends on showing how a grip sits in a hand, how fabric folds or how a cream actually looks, a shoot can capture those details directly. Styling, retouching and lighting still influence the result. Keep an approved sample available and distinguish an attractive campaign treatment from a faithful catalogue view. A heavily retouched photograph can misrepresent a product just as easily as an inaccurate render.
3D rendering suits controlled product presentation. A digital scene lets the team position cameras, adjust lighting and develop views that would be difficult to shoot physically. This can help when a product is still being developed, when several packaging versions share a shape or when the same object must appear in stills and animation. The model must represent the correct design revision, and unusual materials may need substantial development before approval.
Hybrid production suits different needs within one campaign. Photograph the real environment or person, then integrate a digital product where that solves a defined production problem. Alternatively, use photography for tactile close-ups and rendering for clean product views. Plan camera perspective, shadows and lighting together so the assets feel consistent. Hybrid work adds coordination and compositing; it should have a clear purpose rather than become an automatic compromise.
Use a real-product photograph when physical handling, fit or a specific surface is the central message.
Consider CGI when the brief needs controlled angles, an unavailable prototype or a planned family of variants.
Consider a hybrid when the campaign requires both human interaction and flexible product presentation.
The choice also depends on the channel. A small ecommerce thumbnail needs clear shape and readable packaging; a large campaign image may need detailed material work and space for copy. Mimic's advertising services put these outputs into a broader production context. Agree what each image must communicate before choosing the technique.
Compare prototypes, product variants and future changes
Imagine a fitness wearable launching in three strap colours. This is an illustrative brief, not a reported client project. Photography could show a finished watch being worn, while CGI could create consistent isolated views of the colour range. Whether that combination makes sense depends on available samples, approved dimensions, material references and the number of deliverables. Three versions alone do not prove that rendering will cost less.
If the product already exists, provide a representative sample and document what is final. Check the packaging, screen artwork, accessories and finish against the version customers will receive. A shoot needs the right physical items; a CGI production needs enough reliable information to reconstruct them. A prototype with temporary buttons or an unfinished label should not silently become the reference for final sales imagery.
If only CAD or design files exist, rendering can visualise the proposed product before a finished sample is available. CAD may establish shape but still need cleanup, UV mapping, materials or additional detail for close shots. Technical drawings rarely describe every surface imperfection or optical property. Decide whether an image is a concept, a development visualisation or a representation of an approved final design, and label it accordingly where the distinction matters.
For variants, separate a colour or artwork change from a geometry change. Updating a label on an approved bottle may be relatively contained. Changing the bottle profile, closure or embossed detail can affect modelling, lighting and every output. Photography has a similar distinction: a packaging swap might need a new product sample and reshoot, while a different crop may be possible from an existing capture. Ask what each proposed change actually involves.
A practical asset review should identify the current file owner and revision number, which product details are approved, which variants share geometry and which require different components. Keep a small change log. If the design team replaces a clasp after image approval, flag that revision before creating dozens of derivatives. Consistent version control is more useful than assuming either method makes changes effortless.
For fitness equipment, scale creates another decision. A large machine may involve transport and studio space for photography; a detailed digital model may involve extensive reconstruction. Compare those actual tasks. The technology overview explains the studio's wider production capabilities, while product animation cost factors covers the variables to discuss when the deliverables include motion. Avoid applying an animation quote directly to a still-image brief.
Review materials, labels and human interaction for accuracy
The surface of a wellness product often carries the message: clear glass, brushed metal, soft fabric, a matte cap or a viscous cream. Photography records a physical surface under particular lighting. CGI describes that surface through geometry, textures and material settings. Each needs a review process that checks the product as well as the overall visual style.
Start with the most difficult material rather than approving only an easy wide shot. For transparent packaging, compare the silhouette, wall thickness, liquid level, cap and label visibility. For fabric, check the weave, seams and how the material bends. For reflective metal, inspect the shape and placement of highlights. A cream sample can communicate visible texture, but neither a photograph nor a simulation proves how the formulation performs on skin.
Check product truth separately from creative treatment. Establish a neutral reference view alongside the campaign lighting. A warm set can change the perceived colour of a white bottle or pale strap. Screen displays and exported colour profiles also affect appearance, so agree the review conditions and intended channels. Do not promise that one approved screen image guarantees an exact match on every device or in print.
Review text at its final size. The approved label artwork should supply product names, quantities and other wording. Inspect the final crop rather than relying on a large source image where everything is legible. A technically sharp render can still have a distorted logo; a beautifully lit photograph can still hide a required detail in glare. Product and brand owners should approve those details before delivery.
For images involving people, examine contact, proportion and use. A wearable should sit plausibly on the wrist, and a fitness device should be shown with the correct accessories and handling. If a photograph is composited with CGI, check the contact shadow and perspective together. Do not imply that an illustrative model or stock-photo subject used or recommends your product. For treatment, recovery or performance messages, use only claims the brand has substantiated and approved; visual realism is not clinical evidence.
Use three approval passes: shape and scale; materials and artwork; then final composition and output. Consolidate feedback from the people responsible for each area. Our editorial policy describes the separation between production explanation and supported evidence. For broader studio context, consult Mimic's project portfolio, while checking the stated scope of each project rather than treating unrelated work as proof of product-rendering results.
Plan reusable assets and compare a small production pilot
A digital product model can support still images, a turntable or a product animation, but reuse has limits. A model built for a distant pack shot may not contain the detail needed for a macro close-up. An offline rendering scene may be too heavy for an interactive website. Editable models, scene files, materials and textures are separate delivery items unless the proposal explicitly includes them.
Photography also offers reusable assets: alternate crops, cutouts and a coordinated image library. Plan enough resolution and composition space for the agreed channels. A vertical social image and a wide website banner may need different framing rather than an automatic crop. If future content matters, discuss those uses while planning the shoot or scene, before committing to a single composition.
For a packaged wellbeing product, a useful pilot might be one neutral pack shot and one styled close-up. For a wearable, it might be an isolated view plus a real-use photograph. For equipment, it might be a full-object view and a detail that explains an adjustment. These are illustrative starting points. Select a pilot that exposes the difficult parts of your own product rather than commissioning an attractive image that avoids them.
Define the same product revision, angles, final dimensions and intended usage for each proposal.
Identify what the quote includes: sample handling, modelling, styling, retouching, rendering or compositing.
Agree who approves shape, materials, packaging and any factual wording, and how feedback is consolidated.
Specify final files, usage rights, editable source assets and the assumptions behind future adaptations.
Judge the pilot against clear acceptance criteria: correct shape, convincing materials, readable artwork, useful framing and consistent appearance across the required outputs. Record which corrections are included and which represent a change in scope. A cheaper first image may be less useful if every later variation requires rebuilding it; a reusable scene is unnecessary expenditure if the campaign needs only one straightforward photograph.
Adobe's product visualisation overview describes how digital models, graphics and materials work together. That supports the potential for editable visual assets, not a guarantee of savings for your brief. Use the wellness product animation briefing guide when the next stage includes a film. For the still-image decision, ask for a scoped comparison based on your actual samples and files.
Frequently asked questions
What is the difference between 3D product rendering and photography?
Photography captures a physical product through a camera. A 3D product render is calculated from a digital scene containing a model, materials, lights and a camera. Both can produce finished campaign images, but they require different inputs and approval work. Choose according to the product information and outputs you need.
Is 3D product rendering cheaper than photography?
Not automatically. Model preparation, difficult materials, scene complexity and revisions can make CGI demanding. Photography may involve samples, transport, a set, styling and retouching. Compare equivalent deliverables and usage rights. The number of future variants matters, but savings should be assessed from a scoped proposal rather than assumed.
Can a product be rendered before a prototype exists?
Yes, if there is sufficient approved design information to build it. Drawings, dimensions, CAD and material references help define the result. Unresolved details remain assumptions and need review. Make clear when the image represents a concept or development version rather than a finished product customers can already purchase.
Are CAD files enough to create a photorealistic product image?
They can be a strong starting point, but they may not include production-ready materials, textures, packaging artwork or close-up detail. The studio should inspect the files before confirming their suitability. Reference photographs or physical samples can help resolve how the final surfaces should look.
When should a wellness brand choose photography?
Photography is a strong option when real handling, fit, tactile details or a finished sample are central to the message. It can also suit a limited shot list with available products. Review the styling and retouching scope so the final image remains faithful to what is being sold.
Can the same 3D model be used for animation?
Often it can form the starting point, provided its quality, structure and usage rights suit the animation brief. Moving parts, close-ups and new lighting may need additional work. A rendered still does not automatically include an editable model or scene, so agree those deliverables in advance.
How can product colours and labels be checked?
Use approved artwork, material references and a neutral comparison view. Inspect text and logos in the final crop and size. Agree colour profiles and review conditions for the intended channel. Different displays and print processes can change appearance, so avoid treating a single screen approval as a universal colour guarantee.
What should we send when asking for a production recommendation?
Share product photographs or samples, available design files, approved packaging artwork and the intended outputs. Explain which details are final and what might change. Include the planned channels and deadline. Ask the studio to recommend photography, CGI or a hybrid against that specific scope, with assumptions stated clearly.
Conclusion
Photography, 3D rendering and hybrid production solve different visual problems. Start with the product truth and the audience's viewing needs, then compare the work required to produce accurate, usable assets. A representative pilot gives the team something concrete to approve before expanding the campaign.
Explore Mimic Wellbeing's approach, then share your product references and shot list to discuss an appropriate production route.
General information about technology and wellbeing, not personal medical advice. Read our editorial policy.
Continue exploring.

What Affects 3D Product Animation Cost? A Buyer’s Guide
Understand 3D product animation cost factors: models, materials, shots, revisions and deliverables. Prepare a clear brief and compare studio quotes fairly.
Read article
How to Brief a Wellness Product Animation Studio
Prepare a wellness product animation brief covering audience, product facts, assets, formats, approvals and budget. Give your studio a clear starting point.
Read article
Comments